Affiliate Disclosure: As an Amazon Associate I earn from qualifying purchases. Links to Amazon products are affiliate links that support this site at no additional cost to you.
Suspension Restoration Overview
The suspension system is the most overlooked component in classic car restoration. Engine and paint work get the attention, but suspension determines whether the car drives safely and comfortably. A 50-year-old suspension has rubber bushings that have hardened into plastic, ball joints with worn sockets, leaf springs that have sagged inches from their original arch, and shock absorbers that provide zero damping. Restoring the suspension transforms a car that wanders, bottoms out, and handles unpredictably into one that tracks straight, corners flat, and rides as it did when new.
| Component | Symptoms of Wear | Replacement Cost (Parts) | DIY Difficulty |
|---|---|---|---|
| Ball joints (upper/lower) | Clunking over bumps, uneven tire wear, wandering steering | $30–$80 per joint | Moderate (requires press) |
| Control arm bushings | Squeaking, harsh ride, imprecise handling | $15–$40 per bushing | Moderate (requires press) |
| Tie rod ends | Loose steering, tire feathering, failed inspection | $20–$50 per end | Easy–Moderate |
| Leaf springs (rear) | Sagging rear end, bottoming out, reduced ride height | $150–$400 per pair | Moderate |
| Coil springs (front) | Sagging front end, bottoming out, uneven camber | $80–$200 per pair | Moderate (requires compressor) |
| Shock absorbers | Floaty ride, excessive bounce after bumps, oil leakage | $40–$150 per shock | Easy |
| Sway bar bushings | Clunking on turns, body roll | $10–$25 per bushing | Easy |
| Idler arm / pitman arm | Steering wander, excessive play in wheel | $30–$70 each | Moderate |
Suspension component restoration costs and difficulty ratings. Costs are for parts only — professional labor adds $80–$150/hour. No affiliate links in this table — tool recommendations appear in each section below.
Front Suspension: Control Arms, Ball Joints, and Bushings
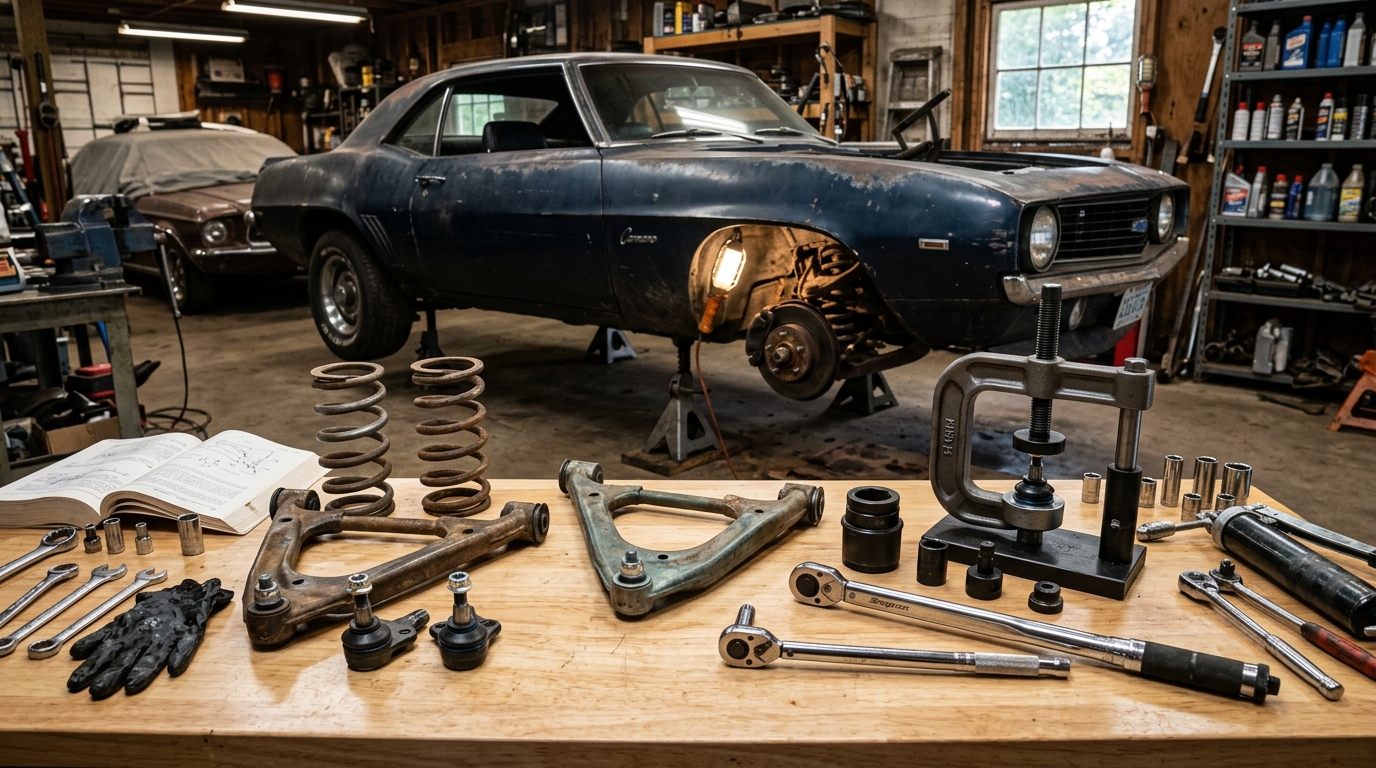
The front suspension is the most complex and critical system to restore. On most 1960s–1970s American cars, the front suspension uses unequal-length control arms (A-arms) with coil springs, ball joints at the steering knuckle, and rubber bushings at the frame mounting points. Over decades, the rubber bushings harden from heat cycling and ozone exposure, losing their elasticity. Hardened bushings transmit road harshness directly into the frame and resist the normal articulation of the control arms, causing a stiff, jarring ride and imprecise handling.
Ball joints are the pivot points between the control arms and the steering knuckle. They consist of a ball stud rotating in a socket with a plastic or metal bearing surface. As the bearing surface wears, axial play develops — the ball moves up and down within the socket. On most passenger cars, axial play exceeding 0.050 inches means the joint must be replaced. Worn ball joints cause clunking over bumps, uneven tire wear (particularly camber wear on the outside edge), and unpredictable steering wander.
Replacing ball joints requires a ball joint press — a C-clamp tool that pushes the joint out of the control arm and presses the new one in. Some joints are riveted to the control arm from the factory (common on 1960s GM cars) and must be drilled out. Never use a torch to heat the control arm to loosen a seized joint — heating forged suspension components alters their metallurgy and can create stress risers that lead to fatigue failure.
OTC 6530 Ball Joint Press Kit
The OTC 6530 is the industry-standard ball joint press kit. It includes the C-frame press, receiving tubes, and adapters needed to press ball joints in and out of control arms on most American cars. The same tool works for U-joint replacement. If you are restoring a classic car suspension, this is the one tool you cannot rent at most auto parts stores — you will need to buy it.
View OTC ball joint press kit on AmazonBushings: Rubber vs Polyurethane
When replacing control arm bushings, you have a choice between rubber (OEM-style) and polyurethane. Rubber bushings provide a softer, quieter ride because rubber has natural damping properties and isolates vibration. They are the correct choice for a restoration that prioritizes original ride quality. Polyurethane bushings are harder and more durable — they last longer, resist oil and ozone degradation, and provide sharper handling response with less deflection under load. The trade-off is more road noise and vibration transmitted into the cabin, and polyurethane requires periodic lubrication to prevent squeaking.
For a driver-quality classic that will see regular use, polyurethane is a practical upgrade. For a show car or concourse restoration, rubber is the correct choice. Most bushing kits are available in both materials from Energy Suspension (polyurethane) and Moog/Prothane (rubber and poly options).
Energy Suspension Master Bushing Kit (vehicle-specific)
Energy Suspension is the leading manufacturer of polyurethane suspension bushings. Their master kits include all control arm, sway bar, and leaf spring bushings for a specific vehicle in a single package. Polyurethane outlasts rubber by 2–3x and improves handling response. Search for your specific make/model/year to find the correct kit. If you prefer OEM-style rubber, Moog replacement bushings are also available.
View Energy Suspension bushing kit on AmazonCoil Spring Removal and Replacement
Coil springs on the front suspension are under significant compression even at rest. Removing them is the most dangerous step in suspension restoration. There are two safe methods: an internal spring compressor (threads inside the coil) or an external spring compressor (clamps onto the outside of the coil). The internal type is safer and more stable. Never use ratchet straps, chains, or improvised methods to compress a coil spring — a released coil spring carries enough energy to cause serious injury or death.
Original coil springs on a 50-year-old car have typically sagged 1–2 inches from their free height. Replacing them with new springs restores the original ride height and camber alignment. Spring rate (measured in lbs/inch) should match the original specification — stiffer springs will raise the car but create a harsh ride and overwhelm the shock absorbers. Eaton Detroit Spring and Moog are the primary suppliers of replacement coil springs for classic American cars.
Griots Garage Internal Coil Spring Compressor
An internal coil spring compressor threads inside the spring coils and compresses them from within — this is the safest method because the spring is captured and cannot escape sideways. External compressors that clamp the outside are less stable and can slip off if the spring is corroded. This tool is essential for front suspension coil spring removal on any classic car with coil springs.
View internal coil spring compressor on AmazonCoil springs store enormous energy under compression. A released spring can punch through a fender or cause fatal injury. Always use a purpose-built spring compressor rated for your spring diameter and rate. Never use ratchet straps, wire, or chains as a substitute. If you are not comfortable with this step, have a shop remove and install the springs.
Rear Suspension: Leaf Springs and Shackles
Most 1960s–1970s American cars use leaf spring rear suspension — semi-elliptical springs mounted longitudinally with shackles at the rear to allow length changes as the spring flexes. After 40+ years, leaf springs lose their arch (sag), the inter-leaf friction increases as the lubricant dries out, and the shackle bushings harden and crack. Sagging rear springs drop the rear ride height by 1–3 inches, alter the pinion angle (causing U-joint vibration), and reduce load-carrying capacity.
Restoration options: replacement springs (new from Eaton Detroit Spring or POSIES), re-arching (sending originals to a spring shop), or adding a helper leaf. Replacement is the most reliable option — new springs are built to original specifications with fresh steel and proper arch. Re-arching is cheaper but the spring steel has already been fatigued and may sag again. When replacing leaf springs, also replace the shackle bushings and U-bolts. U-bolts are torque-to-yield and should never be reused.
Leaf Spring Shackle and Bushing Kit (vehicle-specific)
Shackle bushings are the most overlooked component in rear suspension restoration. Hardened shackle bushings cause clunking over bumps and bind the spring articulation. Replace them whenever you replace the leaf springs. Search for your specific make/model — kits are available from Energy Suspension (polyurethane) and Moog (rubber) for most 1960s–1970s American vehicles.
View leaf spring shackle bushing kit on AmazonSteering Linkage Restoration
The steering linkage connects the steering box to the front wheels via tie rods, tie rod ends, an idler arm, and a pitman arm. Wear in any of these components creates play in the steering wheel — the wheel turns before the wheels respond. This play makes the car wander at highway speeds and prevents precise alignment. On a 50-year-old car, all steering linkage components should be replaced as a set, not individually.
Tie rod ends are the most common wear item. They consist of a ball stud in a socket with a grease fitting (on older cars) or a sealed design (on later cars). To check for wear, jack the front end up and grasp the tire at 9 and 3 o'clock — push and pull horizontally. Any clicking or movement indicates worn tie rod ends. The idler arm (on the passenger side) and pitman arm (attached to the steering box) should be checked for vertical play — more than 0.125 inches of deflection means replacement.
OEMTOOLS 27086 Tie Rod End Separator (Pickle Fork)
A pickle fork separates tie rod ends and ball joints from the steering knuckle without damaging the taper. The fork wedges between the tie rod end and the knuckle, and a hammer strike drives it through, popping the joint loose. This is the fastest method for disassembly. Note: the pickle fork will destroy the grease boot on the joint being removed — this is fine since you are replacing the joint, but do not use it if you plan to reuse the component.
View tie rod end separator pickle fork on AmazonShock Absorber Replacement
Shock absorbers (dampers) control the oscillation of the springs after the suspension encounters a bump. Without shocks, the car would bounce continuously after every road imperfection. By 50,000 miles, approximately 50% of shocks show measurable performance degradation. On a 40+ year-old classic car, original shocks are near-universally failed — they provide little to no damping, causing a floaty, bouncy ride and poor braking performance.
Replacement is straightforward: unbolt the top and bottom mounts, remove the old shock, and bolt in the new one. The critical decision is choosing the correct damping rate. OEM-equivalent shocks (Monroe OESpectrum, Gabriel) provide a soft, comfortable ride. Performance shocks (Bilstein, KYB Gas-a-Just) are stiffer and provide better cornering control but transmit more road feel. For a driver-quality classic, OEM-equivalent is the right choice. For a car that will see aggressive driving or autocross, upgrade to performance shocks.
KYB Gas-a-Just Mono-Tube Shock Absorber (vehicle-specific)
KYB Gas-a-Just shocks are a moderate upgrade over OEM — they are mono-tube gas-charged shocks that provide firmer damping than stock Monroe or Gabriel units without being as stiff as Bilsteins. They are the best choice for a driver-quality classic that needs better handling but still wants a comfortable ride. Search for your specific make/model/year — KYB makes shocks for most 1960s–1980s American cars. For a softer ride, choose Monroe OESpectrum instead.
View KYB Gas-a-Just shocks on AmazonThe Critical Step: Torque at Ride Height
The most common mistake in DIY suspension restoration is torquing the control arm bushing bolts while the suspension is unloaded (hanging free on a jack). Rubber and polyurethane bushings bond to the inner steel sleeve and the outer shell. When the suspension is hanging, the control arm is at full droop — the bushing is twisted far from its neutral position. If you torque the bolts in this position, the bushing is permanently pre-loaded in the droop direction. When the car is lowered to ride height, the bushing twists further, exceeding its design range.
The result is a harsh ride, premature bushing failure, and in extreme cases, bushing tearing within a few hundred miles. The correct procedure: reassemble the suspension with the bolts finger-tight, lower the car to the ground (or use jack stands under the control arms to simulate ride height), bounce the suspension to settle it, then torque all fasteners to factory specifications. This ensures the bushings are at their neutral position when the fasteners are tightened.
Control arm bushings are designed to articulate within a specific range centered on the ride-height position. Torquing at full droop pre-loads the bushing outside this range, causing it to operate under constant stress. The bushing tears, the control arm shifts, and the alignment changes — all within weeks of the "restoration."
TEKTON 1/2-Inch Drive Click Torque Wrench (10-150 ft-lb)
A calibrated torque wrench is essential for suspension work. Every suspension fastener has a factory torque specification — guessing is not acceptable on components that keep the wheels attached. The TEKTON 1/2-inch drive covers 10–150 ft-lb, which encompasses all suspension fasteners on most classic cars. It clicks audibly at the set torque and has a reversible ratchet head. Calibrate it annually if you use it regularly.
View torque wrench on AmazonPost-Restoration Alignment
After any suspension component replacement, a professional alignment is mandatory — not optional. Even if you marked and counted threads on the tie rod ends, the alignment will be off because new components have different tolerances than worn ones. The three alignment angles are camber (wheel tilt from vertical), caster (steering axis tilt from vertical), and toe (wheel direction relative to straight ahead). Factory specifications vary by vehicle, but general tolerances are camber ±0.5°, caster ±0.5°, and toe ±1/16 inch.
Take the car to an alignment shop that has experience with classic cars. Many modern shops only have equipment for late-model vehicles with strut suspensions and may not have the adapters for older control arm suspensions. Call ahead and ask if they can align a [your year/make/model]. Expect to pay $100–$200 for a four-wheel alignment. Bring your factory alignment specs — some shops may not have specifications for 50-year-old cars in their database.
Cost Breakdown: DIY vs Professional
| Approach | Parts Cost | Tool Cost | Labor Cost | Total | Time |
|---|---|---|---|---|---|
| Full DIY (all parts) | $800–$2,500 | $200–$500 (one-time) | $0 | $1,000–$3,000 | 20–40 hours |
| DIY parts + shop alignment | $800–$2,500 | $200–$500 | $150 | $1,150–$3,150 | 20–40 hours |
| Professional (all labor) | $800–$2,500 | $0 | $1,000–$3,000 | $1,800–$5,500 | Shop: 2–3 weeks |
| Front only (DIY) | $400–$1,200 | $200–$500 | $0 | $600–$1,700 | 10–20 hours |
| Rear only (DIY) | $300–$800 | $50–$100 | $0 | $350–$900 | 8–15 hours |
Suspension restoration cost ranges. Parts cost varies by vehicle — common GM/Ford/Mopar parts are affordable; AMC/Studebaker/exotic parts are expensive. Tool costs are one-time purchases that carry across multiple projects.
Common Mistakes to Avoid
Mistake 1: Torquing bushings at full droop
As covered above, torquing control arm bushing bolts while the suspension is hanging causes premature bushing failure. Always torque at ride height. This is the single most common DIY suspension mistake and the most expensive to fix — you will need to disassemble the suspension again to replace the torn bushings.
Mistake 2: Using an impact wrench on suspension fasteners
An impact wrench is the wrong tool for suspension disassembly and reassembly. It can cross-thread fasteners, overtighten bolts beyond their yield point, and damage ball joint threads. Use hand tools for disassembly and a torque wrench for reassembly. The only exception is breaking loose severely rusted fasteners — use penetrating oil (PB Blaster or Kroil) and a breaker bar first, and only reach for the impact gun as a last resort.
Mistake 3: Reusing U-bolts and self-locking nuts
Leaf spring U-bolts are torque-to-yield fasteners — they stretch when torqued and cannot be reused. Reusing them risks the spring shifting on the axle, which changes the pinion angle and can cause U-joint failure. Similarly, nylon-insert self-locking nuts (nyloc nuts) lose their locking capability after one use. Always use new U-bolts and new nyloc nuts when reassembling leaf springs.
Mistake 4: Skipping the alignment
Driving on a freshly restored suspension without an alignment will destroy your tires within a few hundred miles. Even if the car "feels fine," the camber or toe is likely off by enough to cause rapid tire wear. The alignment is not optional — it is the final step of the restoration, not an optional add-on.
Tools Required for DIY Suspension Restoration
| Tool | Purpose | Essential? |
|---|---|---|
| Ball joint press (OTC 6530) | Press ball joints in/out of control arms | Yes — cannot rent at most stores |
| Coil spring compressor | Compress front coil springs for removal | Yes — safety critical |
| Torque wrench (1/2" drive) | Torque all fasteners to factory specs | Yes |
| Tie rod end separator (pickle fork) | Separate tie rod ends from knuckles | Yes |
| Ball joint separator fork | Separate ball joints from spindles | Yes (same tool as tie rod fork) |
| Jack stands (6-ton rated) | Support vehicle safely | Yes |
| Floor jack (3-ton minimum) | Lift vehicle and support suspension | Yes |
| Penetrating oil (PB Blaster/Kroil) | Loosen rusted fasteners | Yes |
| Anti-seize compound | Prevent future corrosion on fasteners | Recommended |
| Digital caliper | Measure bushing and component dimensions | Recommended |
Tool list for DIY suspension restoration. The ball joint press and spring compressor are the two tools you cannot rent at most auto parts stores and must purchase.
PB Blaster Penetrating Catalyst (11 oz)
On any 40+ year-old car, suspension fasteners will be rusted and seized. PB Blaster is the most effective penetrating oil for breaking loose rusted suspension components — spray it on the night before and again 30 minutes before disassembly. It penetrates rust and corrosion better than WD-40 (which is a water displacer, not a penetrating oil). Buy the 11 oz can — you will use it on every suspension fastener on the car.
View PB Blaster penetrating oil on AmazonWhen to Hire a Professional
Most suspension restoration is DIY-able for a mechanically inclined owner with the right tools. However, some situations warrant professional help: (1) if the control arms are severely rusted or bent, they should be replaced by a shop with an alignment rack; (2) if the steering box needs rebuilding or replacement, the pitman shaft preload adjustment requires experience; (3) if you are converting from drum to disc brakes (which involves suspension and steering modifications); (4) if you do not have a safe workspace with level ground and adequate jack stands.
A reasonable middle ground: do the disassembly and parts replacement yourself, then take the car to a shop for the final alignment. This saves $1,000–$2,000 in labor while ensuring the alignment is done correctly on professional equipment.
Sources & References
- Eaton Detroit Spring — Custom Leaf and Coil Springs — Leading manufacturer of replacement leaf and coil springs for classic American cars
- Energy Suspension — Polyurethane Bushing Catalog — Comprehensive catalog of polyurethane suspension bushings by vehicle application
- Moog — Suspension Component Specifications — OEM-style replacement suspension parts with technical specifications and torque values
- Bilstein — Shock Absorber Applications — Performance shock absorber manufacturer with classic car applications
- Hunter Engineering — Alignment Technical Guide — Industry-standard alignment equipment manufacturer with technical resources on alignment angles
- Related: Classic Car Engine Rebuild Cost Guide (2026) — Companion guide covering engine rebuild costs and procedures
- Related: Restoration Cost Calculator — Interactive calculator for estimating total restoration costs including suspension work
- Related: Car Restoration ROI Calculator — Calculate return on investment for restoration projects including suspension upgrades
- Related: Classic Car Winter Storage & Winterization Checklist — Winter storage guide — suspension components should be inspected before storage